Ferrari 312T2, again-3
AK
God Dwells in Small Things

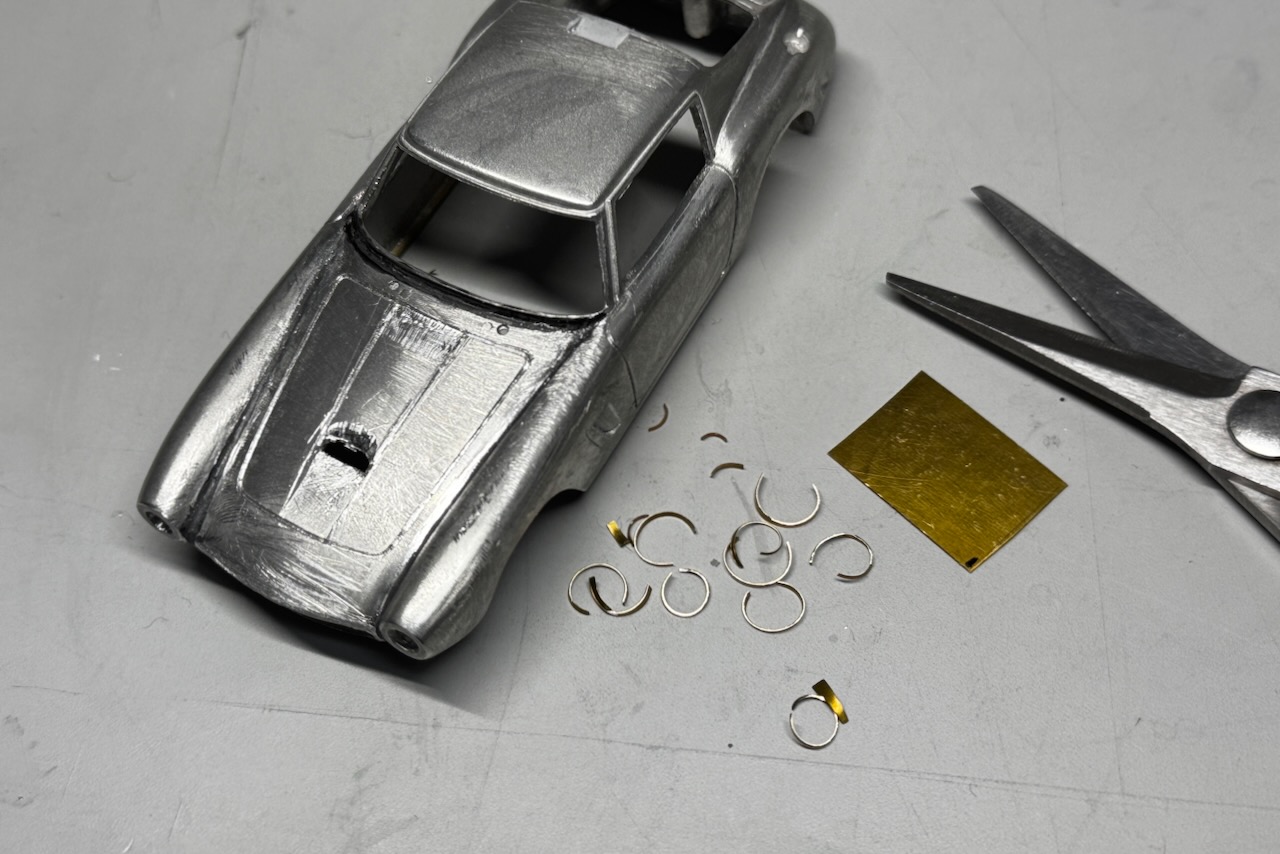
Before getting into the making of the air scoop, I needed to reshape the lower section of the front grille. The lower part of the grille lacked sufficient volume, so I built it up with melted white metal and shaped it with a file.
今回はボンネットのエアスクープの開口について紹介する前に、やり残していたフロントグリルの下部をやっつけます。まずはグリルの下側のボリュームが足りなく見えたので、溶かしたメタルを盛り上げてからやすりで整形しました。
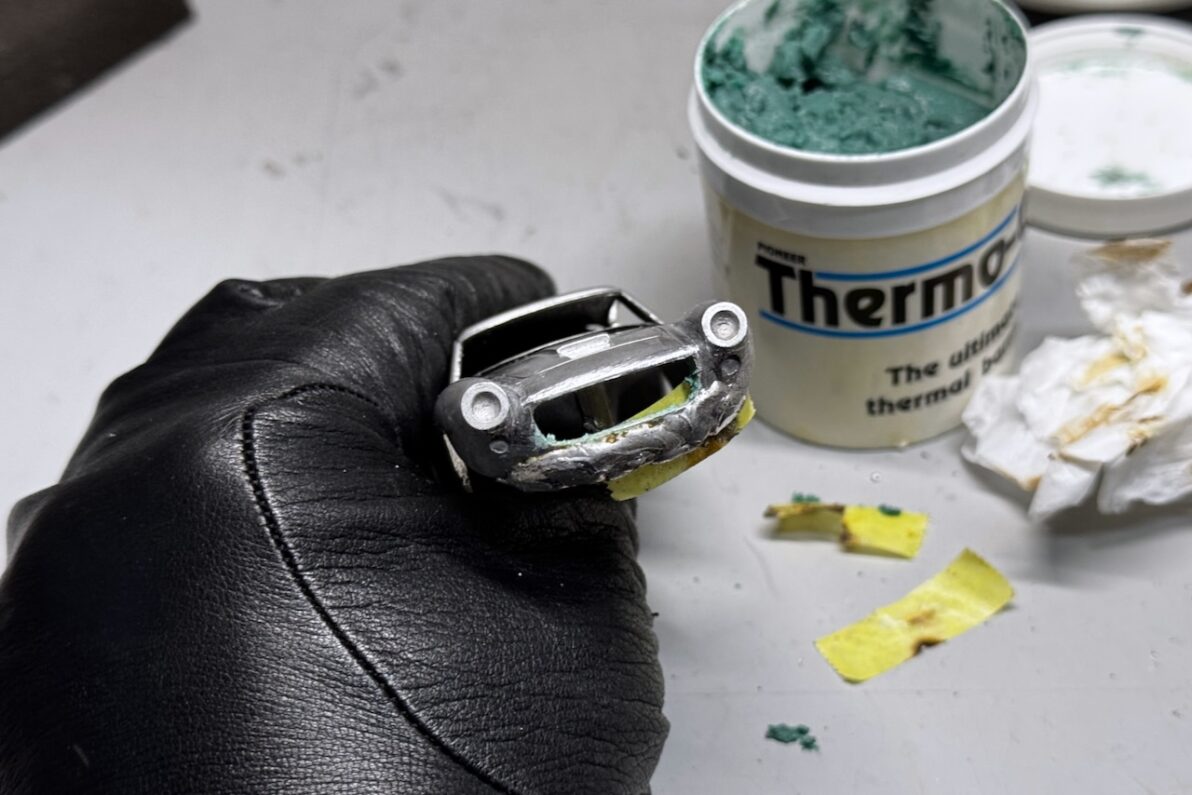
To prevent the grille from deforming due to the heat of the molten metal, I packed the inside with “Thermo-gel” for protection. I think this allows about five seconds of working time. If you don’t have that gel, creating a structural support with instant adhesive mixed with powder can help prevent the metal from melting away.
メタルを溶かし込む際の熱でグリルが変形しないように、グリルの内側にはサーモジェルを詰めて養生しておくと、5秒前後は作業可能です。ジェルがない場合はパウダーを混ぜた瞬間接着剤で、溶け落ちないように構造的な支えを作っておくといいと思います。
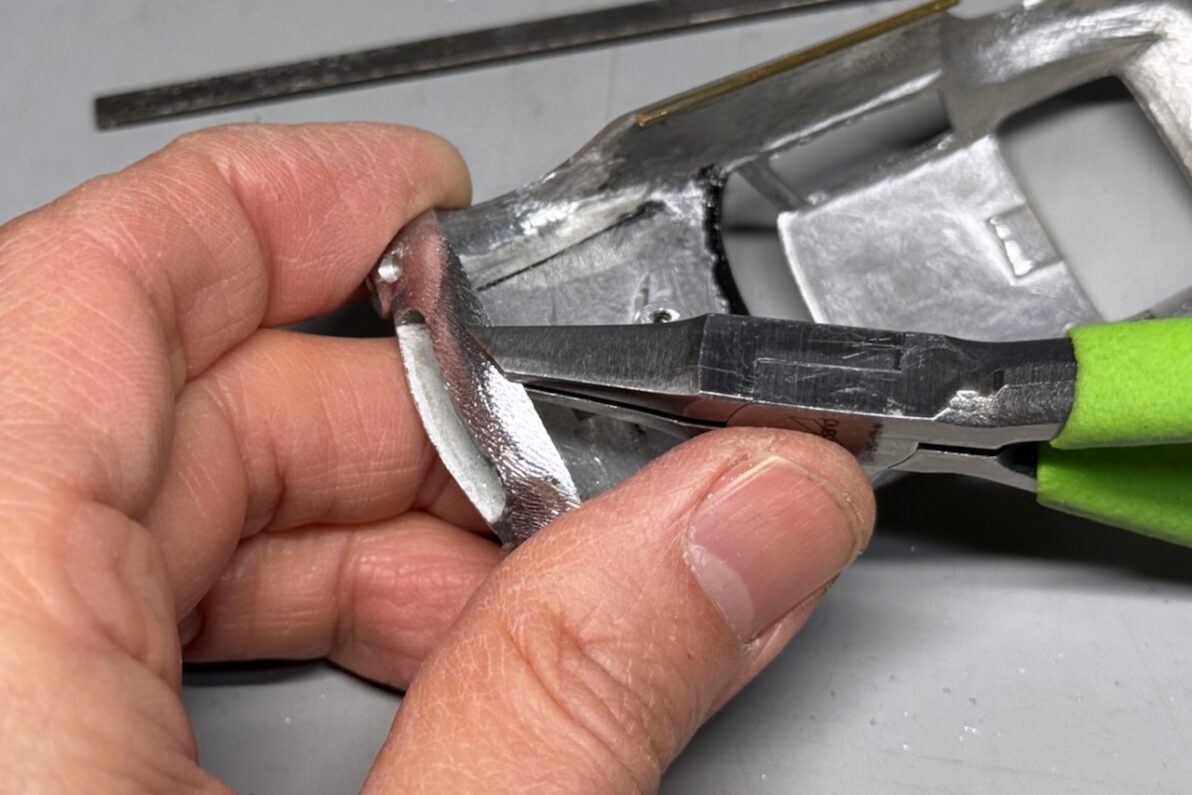
By completely fusing the metal with the body, it becomes strong enough to withstand fine adjustments like bending, stretching, or rolling inward after shaping.
メタルを完全に溶かし込んでボディと一体化しておけば、整形後もこんな感じで曲げたり伸ばしたり、内に巻き込んだりといった微調整が可能になります。
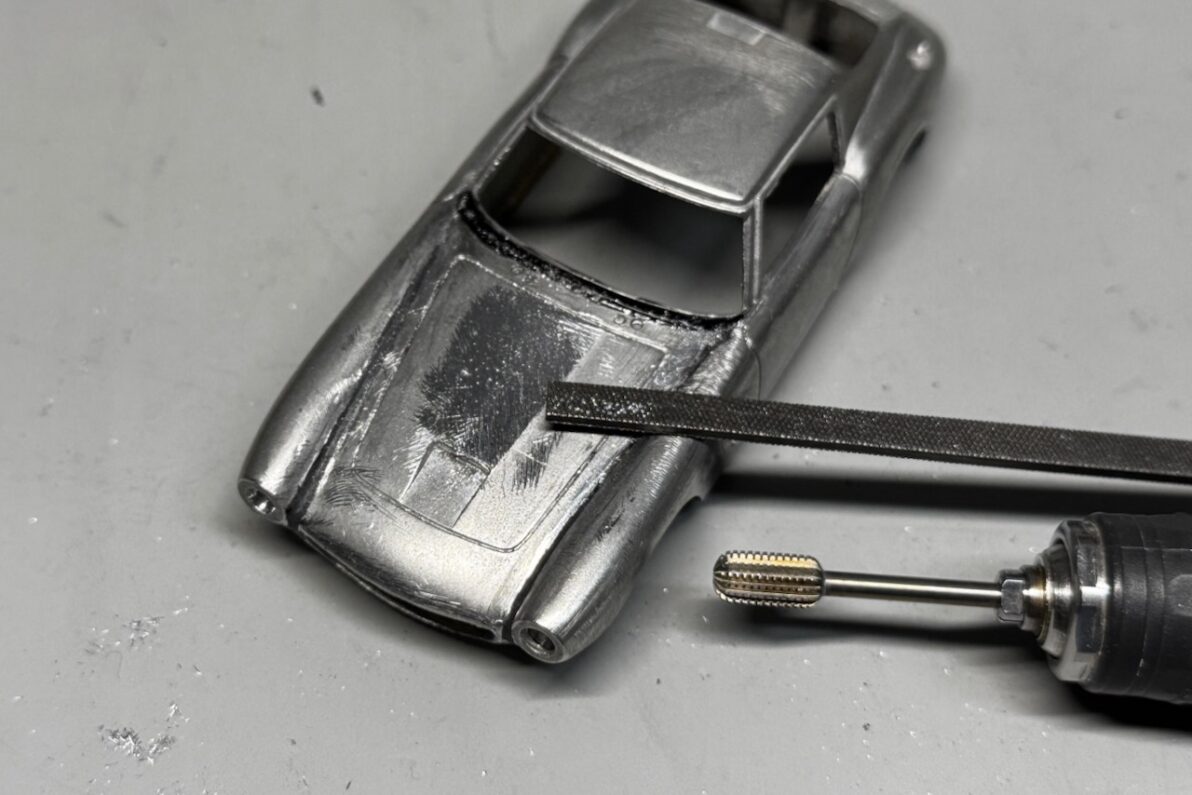
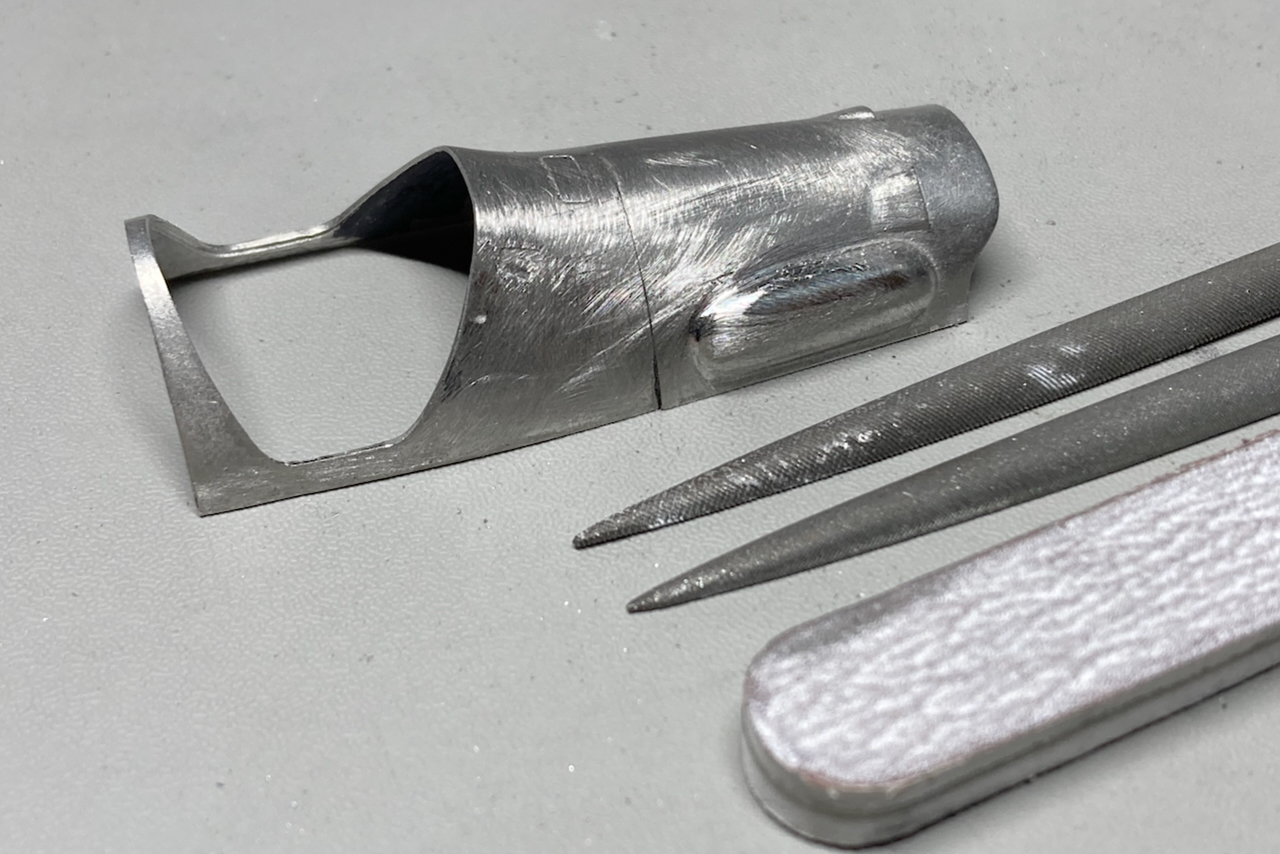
I made the central air scoop on the hood by bending a brass sheet. The main goals are to achieve thin, sharp edges for a more precise look and to eliminate any asymmetrical curves on the hood.
ボンネット中央のエアスクープは、金属板を曲げて作ることにします。開口部のエッジが薄くシャープになって精密感が増すのと、ボンネットの膨らみの左右差を無くすことが主な狙いです。
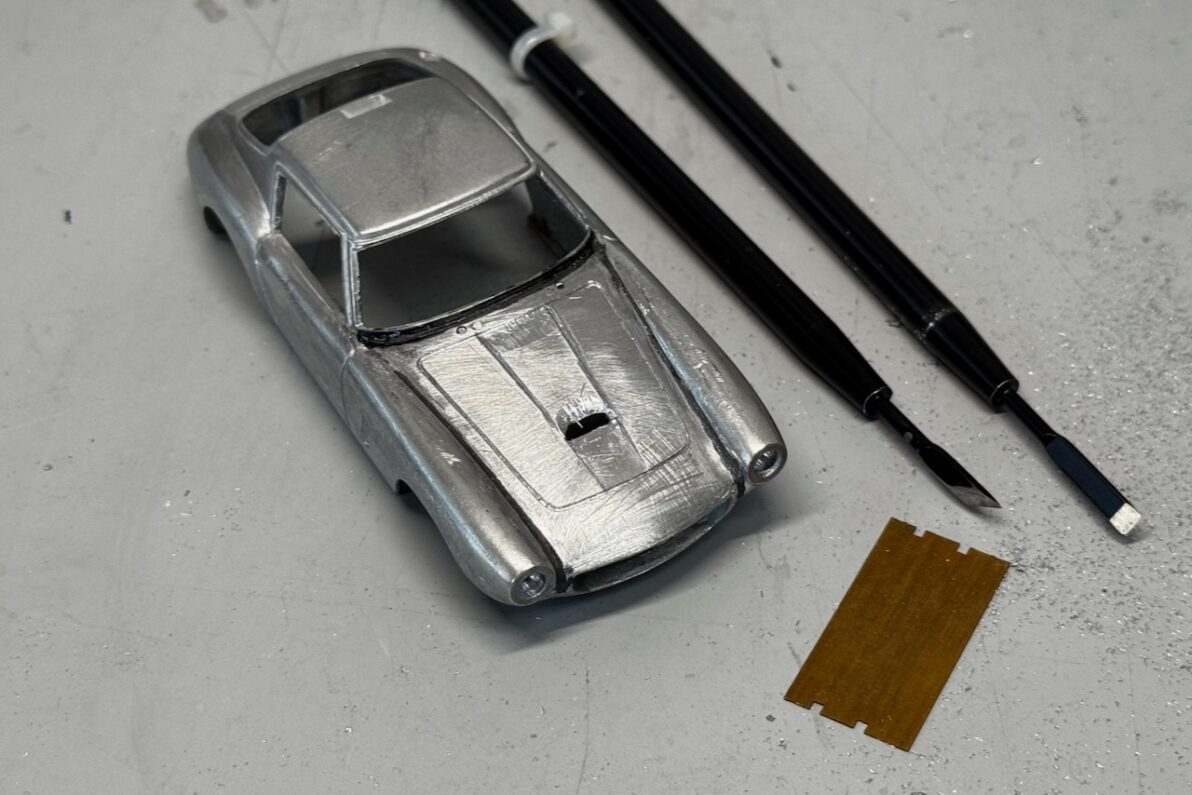
Unfortunately I was out of 0.3mm brass sheets, I used an old PE part intended for a tank (a side skirt for a Panther Ausf.D).
0.3mm厚の真鍮板の材料が切れていたので、古い戦車用のエッチングパーツ(パンターD型の防弾スカート)を使いました。
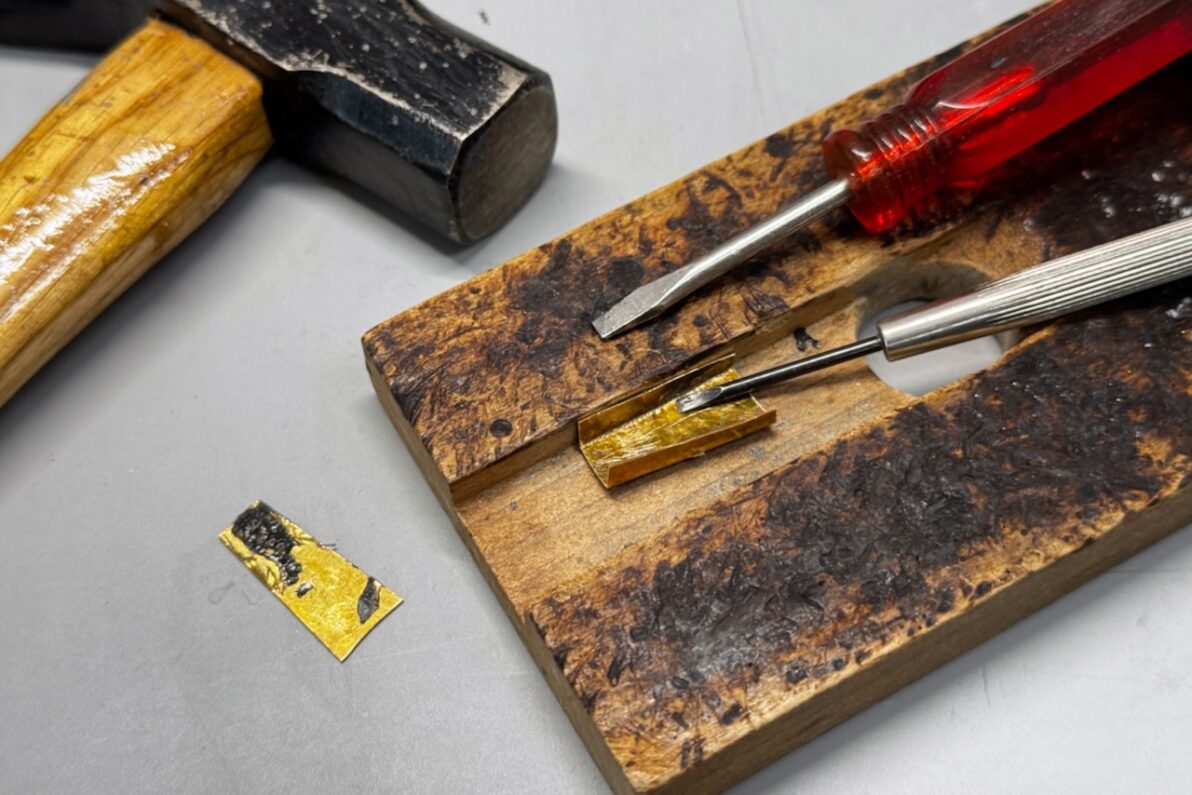
After hammering the sheet to create an overall curve, I scribed fold lines on the back and then bent it 90 degrees with pliers. I then used the tip of a flathead screwdriver like a chisel against the corners to create sharp, defined lines.
金槌で叩いて全体的に湾曲させた後、裏側に折り線をけがいてプライヤーで90度に曲げ、マイナスドライバーの先をノミのように角に当て、シャープなラインを作ります。
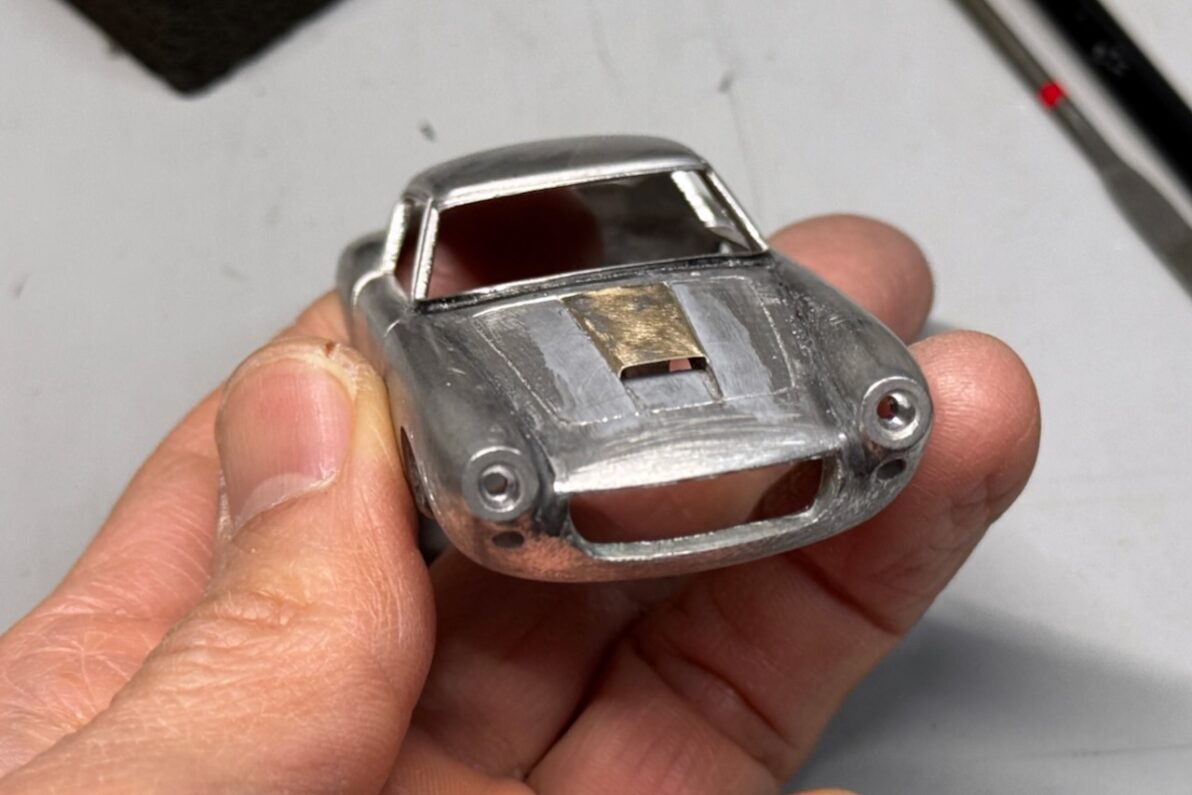
I also carved a slight recess into the body so that the edges of the brass plate sit about 0.3mm inward. Fortunately, the assembly was successful on the first try!
ボディ側にも少しだけ凹みを彫っておき、真鍮板の縁が0.3mmほど内に沈むように調整しました。幸運にも1回でバッチリ決まってくれましたが、フロントグリルの開口部のアンバランスさが目立つので、次回はその修正です。